Thursday, July 30, 2015

Quarter Knees Attached

With the blocking in place, it was simple and easy matter to attach the quarter knees. Like the blocking, the quarter knees are attached to the hull with only thickened epoxy. At this time, I'm not planning to add screws.

The next item on the agenda is to attach blocking for the rear seat.

Starboard quarter knee clamped into place while the epoxy cures.

Port quarter knee clamped into position while the epoxy cures.

Starboard quarter knee, clamps removed.

Port quarter knee, clamps removed.


The next step will be to add blocking here, on the sides of the hull, to support the rear seat.

Wednesday, July 29, 2015

Blocking

The keyword for the current phase of the build, I suppose, would be "blocking."

"Blocking" is the term to describe the little pieces of wood that you add, here and there, to support or reinforce "other stuff," such as: 

  • seats, 
  • deck framing, 
  • and in the case of this post... the quarter knees.

The blocking for the quarter knees, like the quarter knees themselves, are cut from 3/4" mahogany. This blocking will also provide support for the transom handles I'm planning to add later. 

To attach the blocking, I simply used epoxy thickened with #2 silica. 


Blocking for the port quarter knee.

Blocking for the starboard quarter knee.

Starboard side, with the clamps removed.

I used the extraneous thickened epoxy to fill holes and gaps here and there. This is the sheer-to-transom junction on the port side. Here you can also see a cross-section of the overlapping fiberglass cloth on the corner.

I filled in this little gap on the transom, near the motor board. This may be "marine grade" Douglas Fir plywood, but it's obviously not made to BS1088 standards. (The outer layer is 1/4" BS1088 Meranti.)

Small gaps filled in around the top of the transom knees.

Tuesday, July 21, 2015

Quarter knees cut & fitted

Today I cut out the quarter knees from a piece of mahogany. I used the transom knee from the Glen-L plans as the basis for the shape. However I had to change the corner angle to match.

Using my angle finder, I determined the transom-to-sheer corner angle to be 110°, or a 10° outward rake. (The keel-to-transom rake is 12°). Of course, theory is all fine and good... I drew it, I cut it, I planed it. I still had to re-cut it to fit. C'est la vie.

With another angle-finding tool, I determined that the vertical rake from the transom to the midline of the sheer was about 5°. So, I adjusted my planer/jointer to 5° and planed the edge of the knee that will mate to the transom. Happily, it worked great the first time. 

A little minimal corner-cleaning with a chisel, and everything fit great. Repeat for the other side.

I've also heard these pieces referred to as "corner knees." Whatever the proper term is, I still need to finish sanding them.


Mahogany port quarter knee
Port quarter knee.

Starboard quarter knee.

This is where I'm planing to install the rear cleats.


Monday, July 20, 2015

More interior progress

Aside from the area around the foredeck, the sheers are mostly trimmed, as well as the top of the transom.

The remnant of the construction form (which had been stuck to frame #1) has been removed.

Port sheer, looking forward. This area still needs to be faired for the decking.


Floor, looking forward from the back of the boat.

Screws have been trimmed on all the butt joints.

Floor, looking forward from the back of the boat.

Starboard sheer, looking forward.

I still need to add framing to support the deck.

The hole for the bow eye is off-center. However, this was all strong enough to support the front of the boat during the flip, so I imagine it'll be fine left as-is. I do still need to fill in the hole with epoxy to seal it.

Floor, looking aft from the side of the boat. This is where the construction form had gotten stuck to the frame.

Here, I was sanding away excess epoxy along the starboard chine. Before I knew it, I'd sanded through the top ply on the plywood. 

Screws trimmed away from the butt block on the starboard side.

Screws trimmed away from the butt block on the starboard side.

Wednesday, July 15, 2015

Trimming the sheers

It's a pivotal moment when you get the boat hull flipped over. All at once, you can visualize the completed boat; picture yourself and your family in it, riding across the lake or cruising upriver... It all just seems so close.

The reality, though, is that there is still much work to do. Much.

For me, the wondrous gazing at my righted Utility hull quickly gave way to recognizing the abundance of tasks yet to be done. They're so plentiful, I could really just start anywhere

So, I started on the sheers.

Out came the planer, quickly knocking down the mounds of cured epoxy, and cutting into the laminations of the sheer to level them somewhat. While a hand planer can be effective on the edges of plywood, you have to be very careful, because you can quickly cause unexpected damage. The planer is fine for roughing through the excess material, but the sander is much safer from that point on.

I found that the vertical joints in the plywood, such as where the sides meet at the bow or at the transom, were particularly susceptible to unwanted damage from the planer. Fortunately, no harm was done that wasn't going to get cut away, anyway.

It's like fairing, all over again. But this time, there's a boat to look at.


The untrimmed sheer at the transom shows just how much work there is to do. This is the starboard side.
On the port side of the transom, things are looking much better.
Mounds of cured epoxy on the untrimmed starboard sheer.
Up forward, the sheer will have to be faired to the crown of the forward frame so that the deck will fit properly. Here, you can see that the laminated sheer has been planed just a little.
The big glob of epoxy needs to be cleaned off of the starboard sheer, where it meets frame #1.
Looking better on the port side.
Here, I've trimmed off the screw heads, where they were driven through the backing block of the port-side butt joint in the planking. They still need to be sanded flush.
The screws are still untouched on the starboard side.


Sunday, July 12, 2015

FLIPPED!

Today, I finally got the boat hull flipped over & placed on the trailer. Much work remains to be done, but it was a momentous day, nonetheless.


Here, you can see the remnant of the construction form that is glued to the base of frame #1.


Monday, July 6, 2015

Independence Day weekend in the boat shop


The long 4th of July weekend proved very productive. 

I taped off the "waterline" again, and painted a third coat of Sea Foam Green on the bottom. The transition line between the green and the Whidbey White is now much cleaner. Whereas I had "rolled and tipped" the sides for a smooth finish, I simply rolled the bottom, leaving a more textured finish.

How I marked the waterline:
Although I did not try to mark and paint a "true" waterline on the Utility, I did want to avoid the notable upsweep in the bottom paint that you often see on plywood boats. That upsweep comes from following the general practice of painting 2" above the chine (the joint between the side planking and the bottom planking). Maintaining that distance above the chine for the full length of the boat tends to exaggerate the upswept curve where the chine approaches the bow. 

To try to minimize this, I marked 1-1/2 inches above the chine from the transom to the forward-most frame. From there, I marked the line "downward" so that it ended on the actual seam between the side and bottom planking, at the bow. This won't leave a flat waterline, but hopefully the upsweep at the front won't be excessive.


THIS time, to avoid smudges from newspaper ink, I used plastic sheeting to cover the sides of the boat when I painted a 3rd coat on the bottom.

I made & carpeted new bunks for the trailer...
The original bunks were 38" long. These are just a little longer, at 48".
Did I mention I had epoxied the boat to the construction form?
Well, I did. So, another thing I did over the holiday weekend was to lift the boat hull up onto two concrete blocks and a 2x8 balanced on a toolbox. That provided me just enough room to crawl underneath the hull and start cutting away the construction form with a reciprocating saw. So far, I've got about half of the form cut away. It has actually been kind of fun. I've also gotten my first view of the inside of the boat.

The Utility's hull propped up on two concrete blocks, a toolbox, and a 2x8 board.
This pile of rubble is what's left of half the construction form.
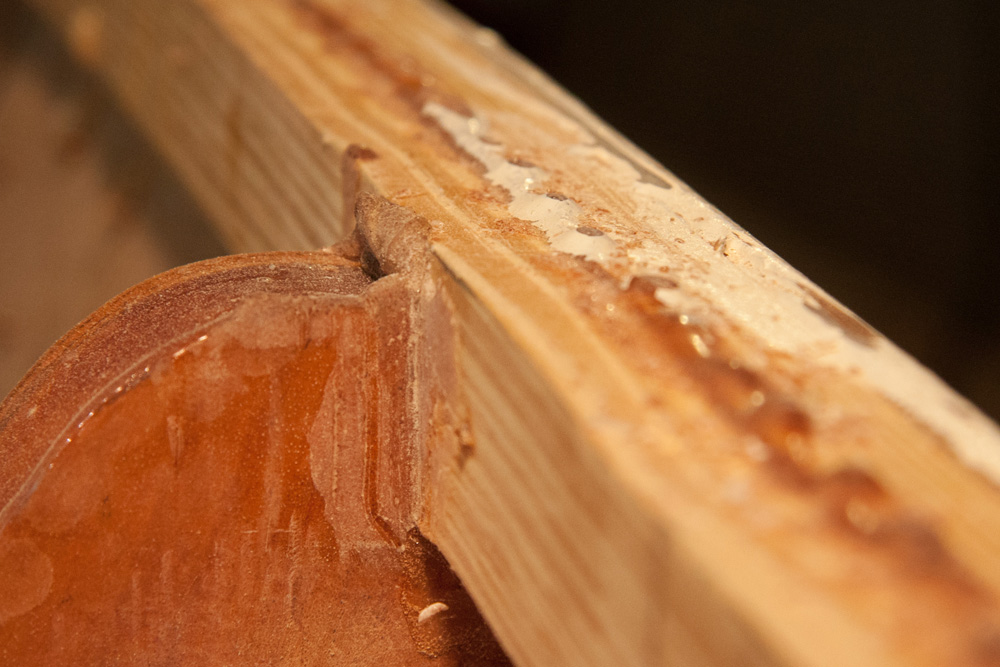
Underneath the boat, here's the transom, transom knees, etc...

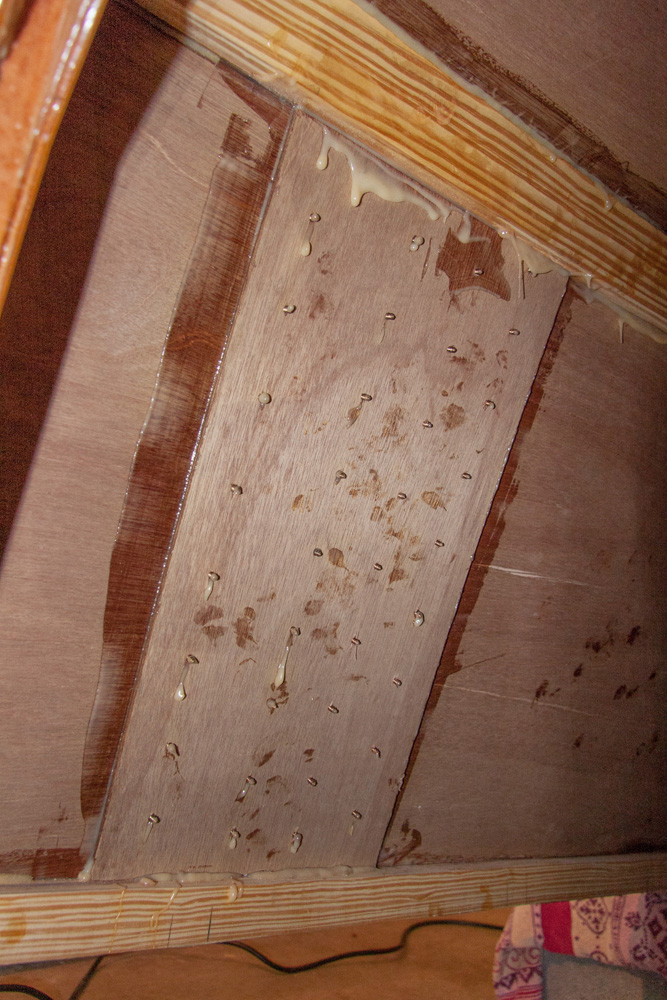
Looking forward, from the middle part of the boat toward the bow.
Backing block for the butt joint on the starboard side.
Backing block for the butt joint on the port side.
Butt joints across the bottom.